Download the free lidded box template
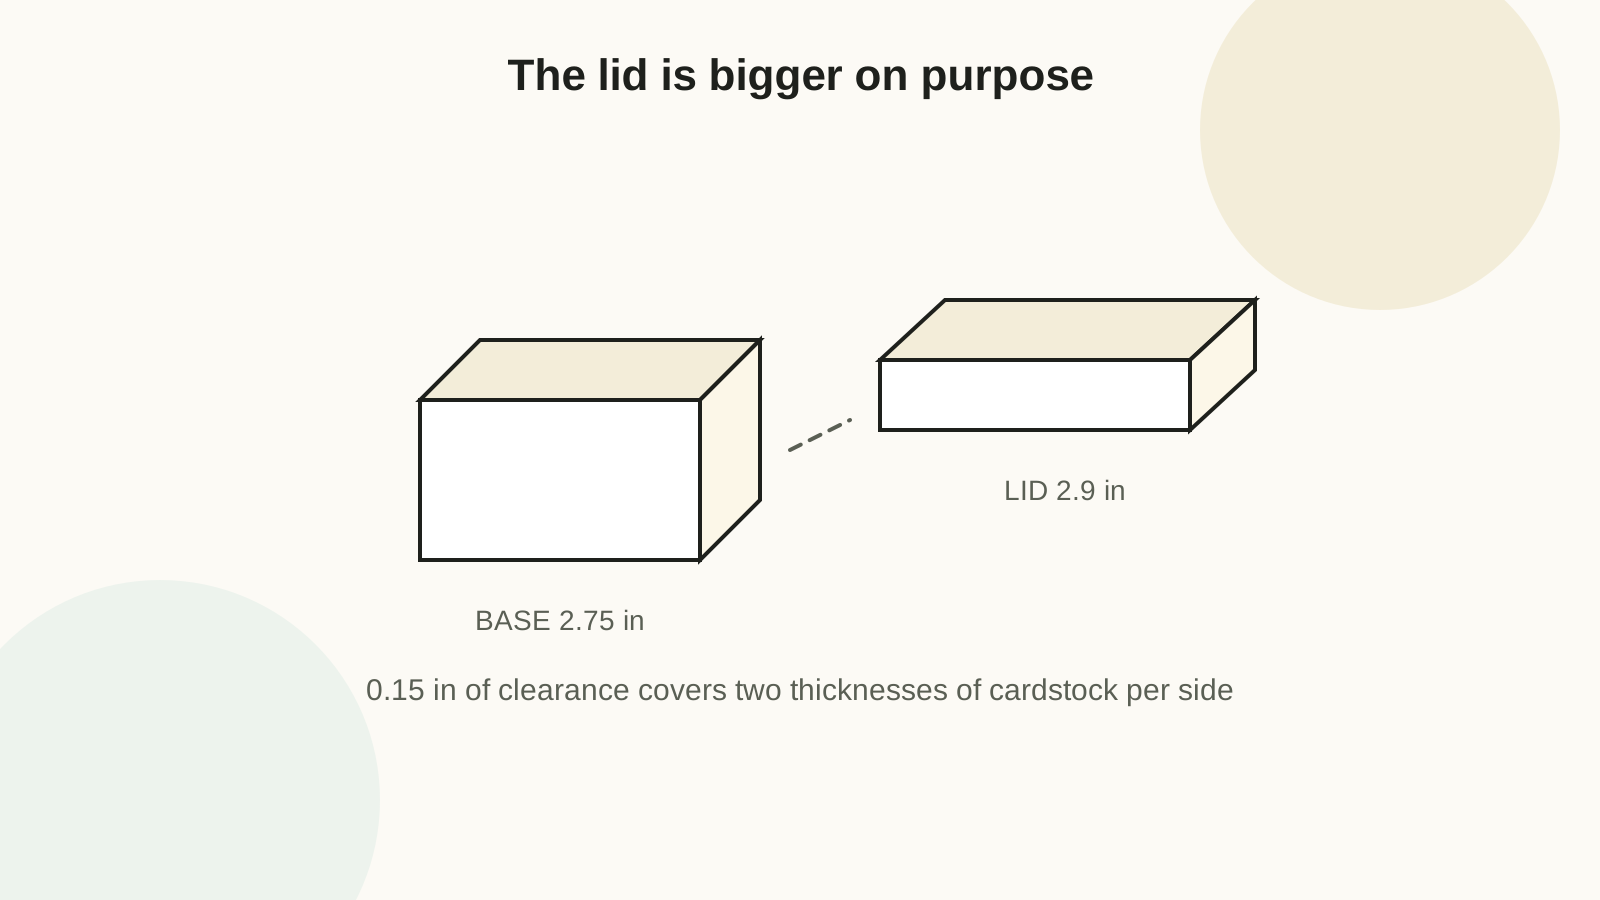
Base (2.75 x 2.75 in, walls 1.1 in) and fitted lid (2.9 x 2.9 in, walls 0.75 in) on one letter sheet, with corner glue tabs and all score lines marked. The lid is deliberately 0.15 in wider so it slips over the base instead of jamming.
Download template (SVG) Open and print Print at 100% / Actual Size with scaling off; verify the 1-inch test square. Print on the inside face of the cardstock so no lines show on the finished box. Full settings walkthrough: how to print at actual size.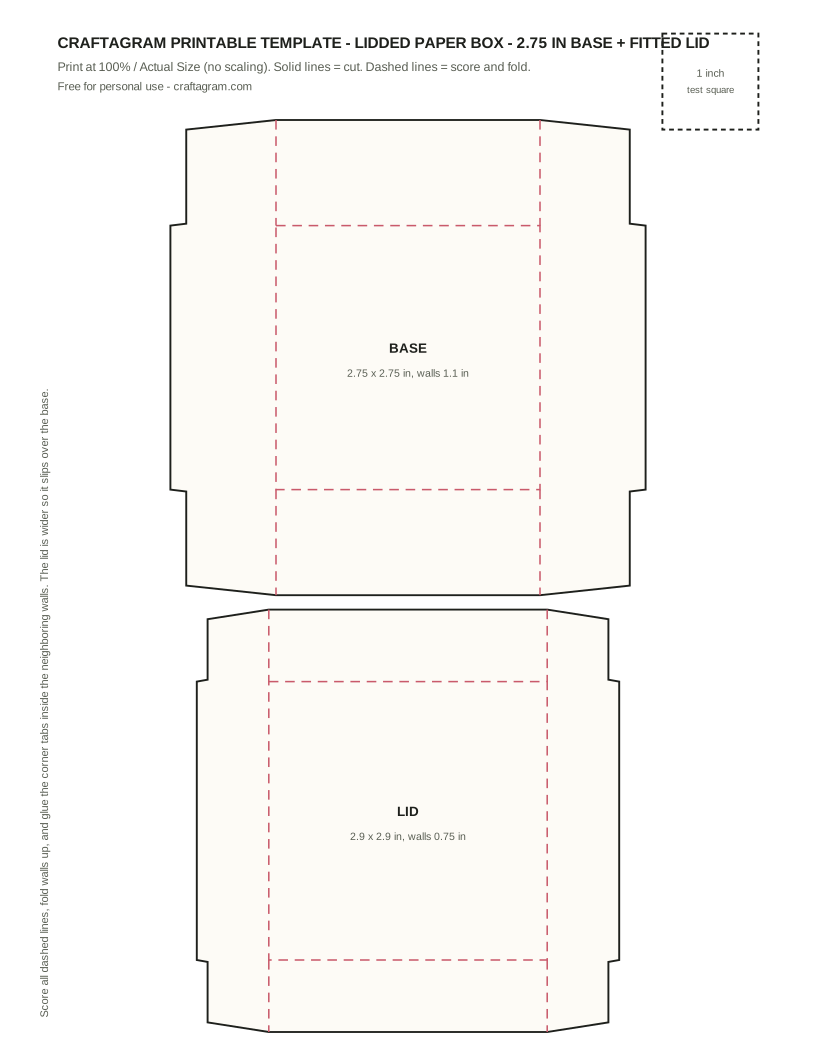
The one rule that makes lidded boxes work
The lid must be bigger than the base — and by more than feels right on paper. Cardstock has thickness: when the lid drops over the base, two layers of paper occupy the gap on each side. Make the lid face at least 1/16 inch wider and longer than the base for 65 lb cover, and 3/32 to 1/8 inch for 80 lb and up. A lid drawn to the same size as its base will jam, bow the walls outward, and shear its own corners the third time someone opens it.
This template builds in 0.15 inch of clearance, which lands in the "lifts off with a gentle shake" range for 65-80 lb cover. If you want the satisfying slow whoosh fit of a rigid gift box, reduce the lid to 0.1 inch over the base — and accept that it will need re-squaring if it ever gets crushed in a drawer.
Cut, score, fold, glue — in that order
- Cut both outer outlines, including the small corner tabs.
- Score every dashed line before folding anything. Use a bone folder, scoring board, or empty ballpoint against a ruler. Unscored cover stock cracks, and swollen cracked corners are the number one reason handmade boxes look handmade in the wrong way.
- Fold all walls up dry and check that corners meet at right angles. Fix problems now: a crooked corner at this stage is a score-line error, not a folding error.
- Glue the corner tabs inside the neighboring walls, one corner at a time, clamping each with a clothespin for a minute. Work diagonally — opposite corners first — so tension stays balanced.
- Let both pieces dry empty for 15 minutes. Fit the lid only after the glue has set; testing early twists wet joints.
Sizing a box around real contents
Measure the item and add 0.25 to 0.5 inches in each direction — exact-fit boxes are frustrating to pack and easy to crush. Then check the parts against these starting points:
| Part | Good starting point | Why it matters |
|---|---|---|
| Corner or side tabs | 0.35-0.5 in wide | Enough glue area without stealing interior space. Small box, small tab. |
| Lid clearance | 1/16-1/8 in over base | Covers two thicknesses of cardstock per side. |
| Wall height ratio | Lid walls ≈ 60-70% of base walls | Shows a band of the base color and makes the lid easy to grip. |
| Bottom panel | Reinforce for anything heavy | Glue a chipboard or doubled-cardstock square inside the base floor. |
Contents 3 x 5 x 1 in → base interior 3.375 x 5.375 x 1.375 in. Lid face: add 1/16 in each way → 3.4375 x 5.4375 in, walls 0.9 in. Flat base footprint: 3.375 + 2(1.375) = 6.125 in by 5.375 + 2(1.375) = 8.125 in — fits letter paper. Flat lid: 5.24 x 7.24 in — fits a second sheet with room for a matching gift tag. Two sheets, one box, roughly 30 minutes including drying.
Box styles, honestly compared
| Style | Difficulty | Best for | Watch out for |
|---|---|---|---|
| Two-piece lidded (this template) | Easy | Gifts that deserve an unboxing moment | Lid clearance; needs two sheets at larger sizes |
| Tuck-flap cube | Easy | Party favors in quantity — see the mini favor box | Flaps pop open in goody bags without a sticker or twine |
| Pillow box | Medium | Gift cards, soft items | Fussy in stiff paper; curved scores need a machine or patience |
| Sleeve and tray | Medium | Cookies, soap, card decks | Needs generous clearance — two layers slide against each other |
Reinforcing for heavier gifts
For soap, candles, jars, or anything over a few ounces: cut chipboard or doubled cardstock to the exact interior floor size and glue it flat inside the base. Glue wall seams with a cross-hatched layer of tacky glue rather than a single line, and clamp until dry. If the item has hard corners, add a folded tissue collar so the corners never bear directly on a glued seam. A paper box carries surprising weight straight down through its walls; what it cannot survive is a heavy item punching a corner seam from inside.
Printing on decorative stock
Print the template mirrored onto the back of single-sided decorative cardstock, so score lines land on the inside of the finished box. If the stock cannot go through your printer (12 x 12 scrapbook paper, foil finishes), print on plain paper, staple it to the good sheet through the waste areas, and cut both together. Textured cardstock is usable but crack-prone: keep the texture on the outside and score firmly so the fold happens in the score channel, not beside it.
Fold the first box with no glue. If the lid fights you dry, the finished batch will be worse once adhesive and contents are added. Adjust clearance before cutting the rest.
Label the test template
When a box finally fits, write the inside dimensions, paper weight, and date on the flattened test box and keep it. Future batches go faster when you know exactly which version worked and what it was designed to hold.
FAQ
Can a paper box hold candy?
Yes, if the candy is wrapped and the floor is reinforced. Standard cardstock and adhesives are not food-safe, so line the box or bag the treats in cellophane first.
Why are my corners not square?
Unscored folds or tabs glued too quickly. Score every line, fold the box empty first, glue one corner at a time, and press each against a flat surface while it sets.
What is the difference between a score line and a fold line?
A score is a compressed groove that tells the paper where to bend; the fold is the bend itself. Score first, always — cardstock folded without a score picks its own crease path, and it never picks straight.