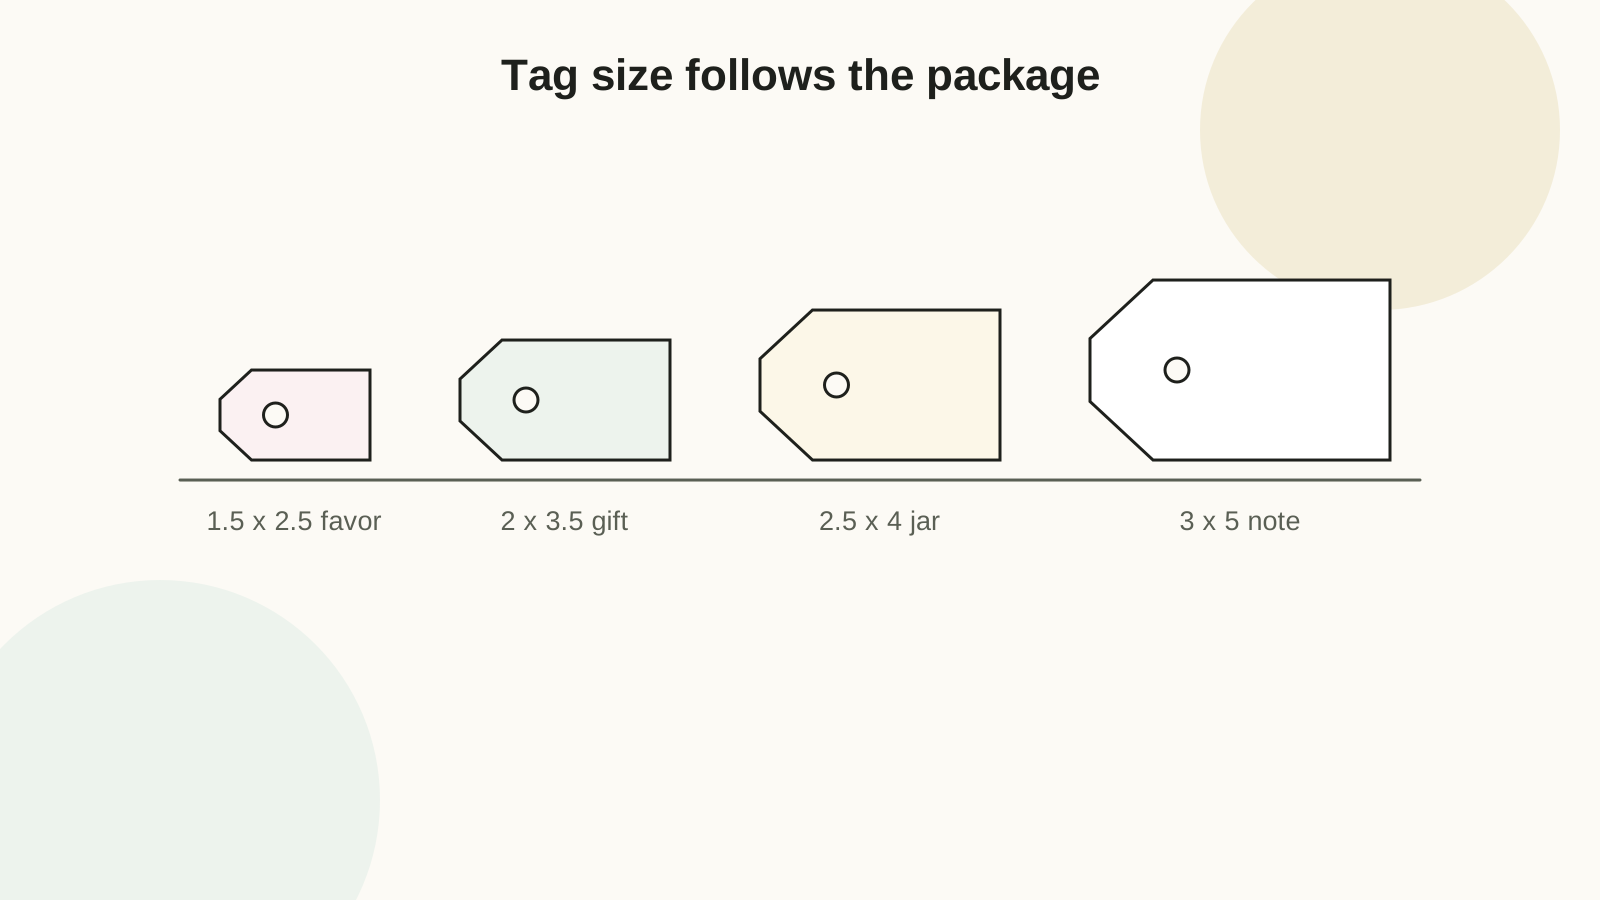
Tag sizes by what they hang on
A 2 x 3.5 inch tag is the flexible default — big enough for a name and a line, small enough not to flap. Deviate deliberately:
| Use | Tag size | Watch out for |
|---|---|---|
| Party favor bags | 1.5 x 2.5 in | Keep names short; thin twine only. |
| Most wrapped gifts | 2 x 3.5 in | Leave a quiet area for a handwritten line. |
| Jars, baskets, teacher gifts | 2.5 x 4 in | Heavier stock so the tag does not curl against glass. |
| Gift-card note tag | 3 x 5 in | Treat it as a tiny card, not a dangling label. |
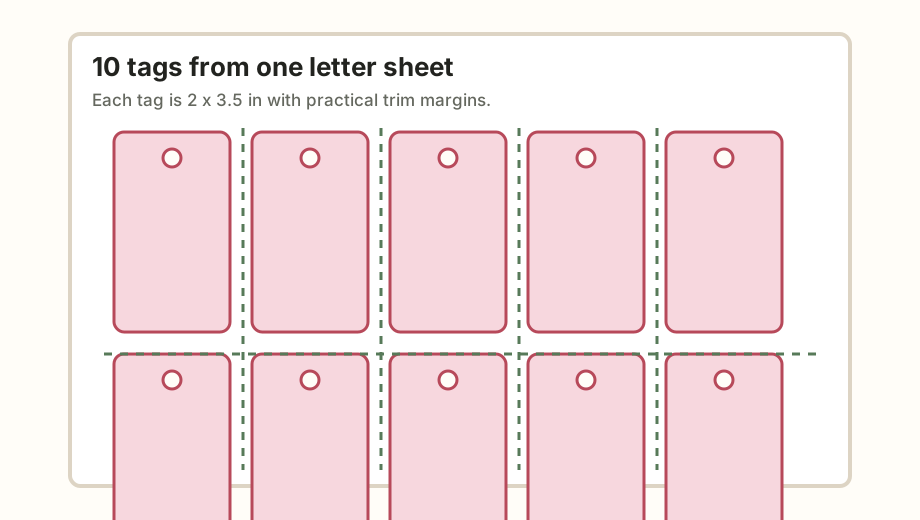
Want a ready-made batch at the default size? The one-sheet gift tag project includes a free printable template that fits ten 3.5 x 2 tags on letter paper, with the full cutting order.
Paper weight, in one honest paragraph
80 lb cover stock is the everyday tag weight: crisp under twine, flat against a package, still printable on most home printers. Step up to 100 lb cover for luxury tags, watercolor details, or tags meant to be reused. If your printer refuses heavy stock, print on text weight and glue the print to blank cardstock after cutting — the laminated tag is actually stiffer than either sheet alone. Regular copy paper alone always disappoints: it curls within a day of hanging. Weights and gsm equivalents are in the cardstock weight guide.
Printing on kraft and colored stock
Home printers cannot print white. Any white in your design becomes the paper color, so design for kraft with dark charcoal or black graphics and let the paper be the background. Reds and greens print muted on brown; test one sheet before a batch. For simulated metallic or foil textures, glossy photo paper renders them most convincingly — but glossy resists handwriting, so pair it with a name written before assembly in paint pen or printed directly.
Hole placement and reinforcement
Punch at least 0.25 inches from the top edge, centered — closer to the edge and one firm tug tears through. Use a 3/16 inch punch for twine, 1/4 inch for ribbon. For tags on heavy gift bags or anything a child will carry by the tag, add a paper reinforcement circle on the back, or fold a small kraft strip over the top edge before punching so the hole passes through three layers.
Shaped tags: effort versus payoff
| Tag shape | Per letter sheet | Cutting effort |
|---|---|---|
| Straight rectangle | 10-12 | Low — trimmer only |
| Angled luggage shape | 10 | Medium — trimmer plus corner clips in stacks |
| Circle, 2.5 in | 12 | High by scissors; trivial with a 2.5 in craft punch |
| Folded card tag | 6 | Medium — needs a score pass before cutting |
Craft punches are the honest shortcut for circles: they align instantly and produce edges scissors cannot match. For everything else, a rotary trimmer for long cuts and a craft knife with a metal ruler for details covers the whole table above.
Design rules that survive the printer
- Leave a writing area. Names need contrast more than decoration — keep at least 1.5 x 1.5 inches quiet, even on a decorative tag.
- Respect printer drift. Home printers shift artwork a millimeter or two between sheets. Designs that bleed into the trim gap forgive this; hairline borders at the cut line advertise it.
- Dry before cutting. Inkjet ink on cardstock needs minutes, not seconds — a trimmer blade through wet ink drags a smear across the whole strip. More printer specifics in inkjet vs laser for printables.
- Flatten curl immediately. Ink moisture curls cardstock. Two hours under heavy books right after printing beats fighting curled tags at the cutting stage.
Batch workflow
Separate the work into stages — print, rough cut, detail cut, punch, tie — and finish each stage for all tags before starting the next. Stage work is faster and dramatically more consistent than finishing tags one at a time, because your hands repeat one motion instead of five. Keep an envelope for miscuts; they become test pieces for ribbon, ink, and corner rounding.
Print one tag on plain paper, cut it, and tie it to the actual package. A tag that looks perfect on screen can feel oversized once ribbon and wrapping enter the picture.
FAQ
Can gift tags be printed on regular paper?
They can, but they feel flimsy tied to a package. If copy paper is what you have, glue the print onto blank cardstock, or use it as a flat label on the wrapping instead of a hanging tag.
Should tags have rounded corners?
Optional, but rounded corners survive handling better and make batch-cut tags look finished. Cut all tags first, then round corners as a separate stage.
Can I print tags on sticker paper?
Yes — full-sheet matte sticker paper makes peel-and-stick labels that skip twine entirely. Choose the right sheet with the sticker paper guide.