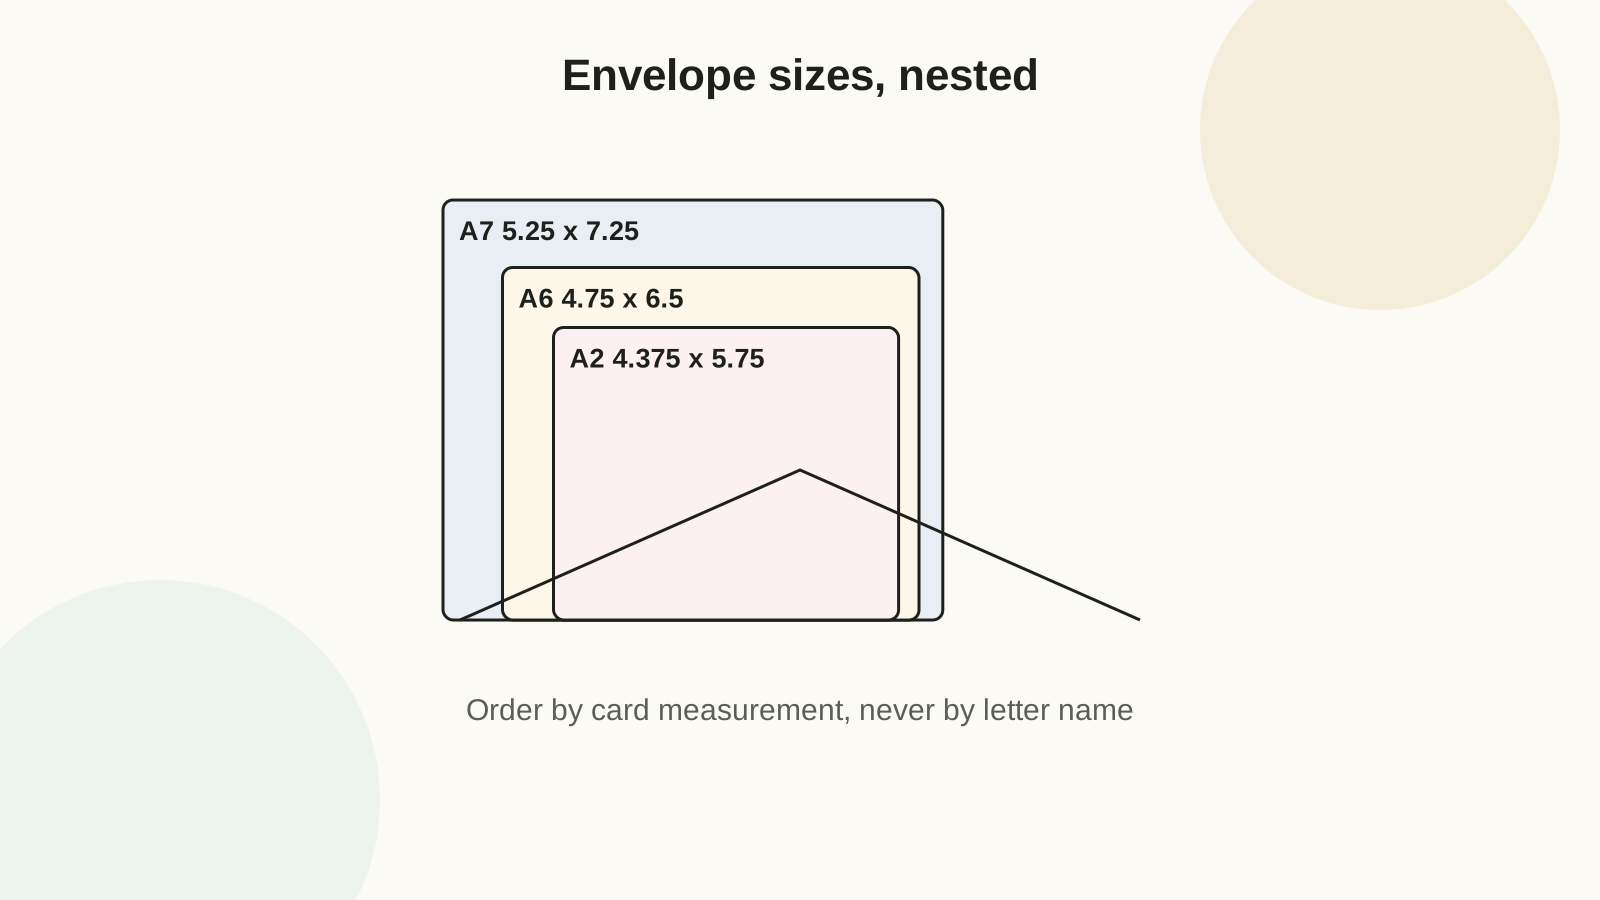
The sizing method, in one paragraph
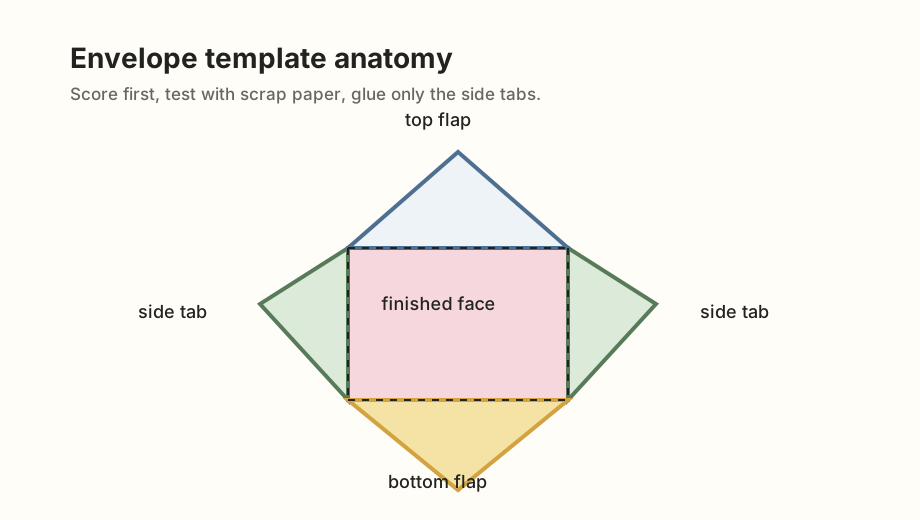
Measure the insert. Add clearance (the table below says how much). That sum is the envelope face. Draw the face as a rectangle, add side flaps, a bottom flap, and a top flap around it, and you have the flat template. Everything on this page is refinement of those four steps — and if you want the arithmetic done for you, the envelope size helper takes an insert measurement and returns the face and flat-template sizes.
If your insert is a standard 4.25 x 5.5 inch card, skip the drafting entirely: the A6 envelope template is a ready-to-print version of exactly this method.
Clearance by insert type
| Insert | Add to each dimension | Why |
|---|---|---|
| Single flat card | 0.25 in | Slides without looking loose. |
| Layered or embellished card | 0.375 in | Foam tape and layers thicken corners, which catch first. |
| Photo stack (up to 10 prints) | 0.375 in | Stacks behave like one thick card. |
| Cash or gift card | 0.25 in | Snug is fine for an envelope opened once. |
| Seed packet | 0.5 in | Seeds settle unevenly and bulge the middle. |
| Booklet or anything thick | 0.25 in + 2x the thickness | A 1/4 in thick booklet needs an extra 1/2 in of face, or the corners tear when the flap closes. |
Ready-made numbers for common inserts
| Insert | Insert size | Envelope face | Flat template (approx.) |
|---|---|---|---|
| Quarter-fold card | 4.25 x 5.5 in | 4.5 x 5.75 in | 6.5 x 10 in — fits letter paper |
| Standard photo print | 4 x 6 in | 4.25 x 6.25 in | 6.25 x 10.5 in — fits letter paper |
| Gift card carrier | 2.125 x 3.375 in | 2.375 x 3.625 in | 4.4 x 6.6 in — two per letter sheet |
| Cash / check sleeve | 3 x 6.5 in | 3.25 x 6.75 in | 5.25 x 9.75 in — fits letter paper |
| Square card | 5 x 5 in | 5.25 x 5.25 in | 7.25 x 9.25 in — mails with a surcharge, see FAQ |
| Mini note | 2.5 x 3.5 in | 2.75 x 3.75 in | 4.75 x 6.75 in — four per letter sheet |
Flat template estimates assume 1 in side flaps, a bottom flap at 40% of face height, and a top flap at 30%. Larger faces need proportionally deeper flaps to keep the seal secure.
Drafting the flaps
Side flaps: 0.75 to 1 inch, tapered slightly so the bottom flap lands on them cleanly. Wider is not better — wide flaps steal interior space and stack bulk at the corners.
Bottom flap: about 40 to 45% of face height. It must overlap the side flaps by at least half an inch, because that overlap is the only glued structure in the envelope.
Top flap: style decides. A pointed flap is drafted from the center of the top edge to the two corners — classic, closes with a sticker or wax seal. A straight flap is fastest to cut and easiest to label — right for seed packets and cash envelopes. A rounded flap reads softest for handmade cards — trace a coin or bowl edge at the corners after the fit is confirmed.
Packet contents sit at about 3 x 4.5 in once filled. Face: 3.5 x 5 in (the full 0.5 in seed clearance). Flat template: 3.5 + 2(0.75) = 5 in wide, 5 + 2 + 1.5 = 8.5 in tall — two per letter sheet, rotated head-to-toe. Use a straight top flap, fold it down 1.5 in, and close with a washi strip so the packet reopens for planting instructions. Twenty packets = 10 sheets of text-weight paper.
Paper choice
Text weight (70-80 lb text / 100-120 gsm) folds crisply, goes through home printers, and is right for everyday envelopes. Lightweight cardstock (65 lb cover) suits gift-card envelopes that get handled — but score every fold first. Patterned scrapbook paper works for hand-delivered pieces; it is often brittle at folds, so test one corner before committing. The full weight comparison is in the cardstock weight guide.
Fit problems and their actual causes
| Symptom | Cause | Fix |
|---|---|---|
| Insert catches at corners | Clearance too small for the insert's thickest point | Recut the face 1/8 in larger each way |
| Envelope bows after gluing | Paper too heavy, or tabs overlapping too far inside | Trim side flaps narrower; drop a paper weight |
| Flap does not reach | Flap drafted from an undersized face | Extend the flap panel only — never the whole envelope |
| Envelope looks bulky | Wide tabs + heavy paper stacking at corners | Narrow the tabs to 0.75 in, press corners under a book |
Liners and decoration
Fit first, decorate second. For a liner: trace the face and top flap of your template onto lightweight decorative paper, trim 1/8 inch off the sides and 1/2 inch off the bottom, slide it in, and glue only the flap area — the liner must not reach the fold line or the flap stops bending freely. Raised decorations (buttons, wax seals, bulky knots) belong on hand-delivered envelopes; postal machines crack them.
Face down, envelope flaps look surprisingly alike. Pencil a small mark on the top flap of the draft so the finished pattern does not end up upside down.
FAQ
Do square envelopes cost extra to mail?
Yes. USPS and many other postal systems classify square envelopes as non-machinable, which adds a surcharge. If the design allows, keep the envelope rectangular and let the card inside be square.
Can I make envelopes from scrapbook paper?
Yes, when the paper folds cleanly — fold a scrap corner first to see if the pattern layer cracks. Best for hand-delivered cards, gift cards, and party favors rather than mailed items.
How do I repeat a size I got right?
Label the scrap-paper draft with insert size, clearance, tab width, and paper weight, then keep it flat in a folder. A labeled draft is a pattern library; an unlabeled one is scrap.