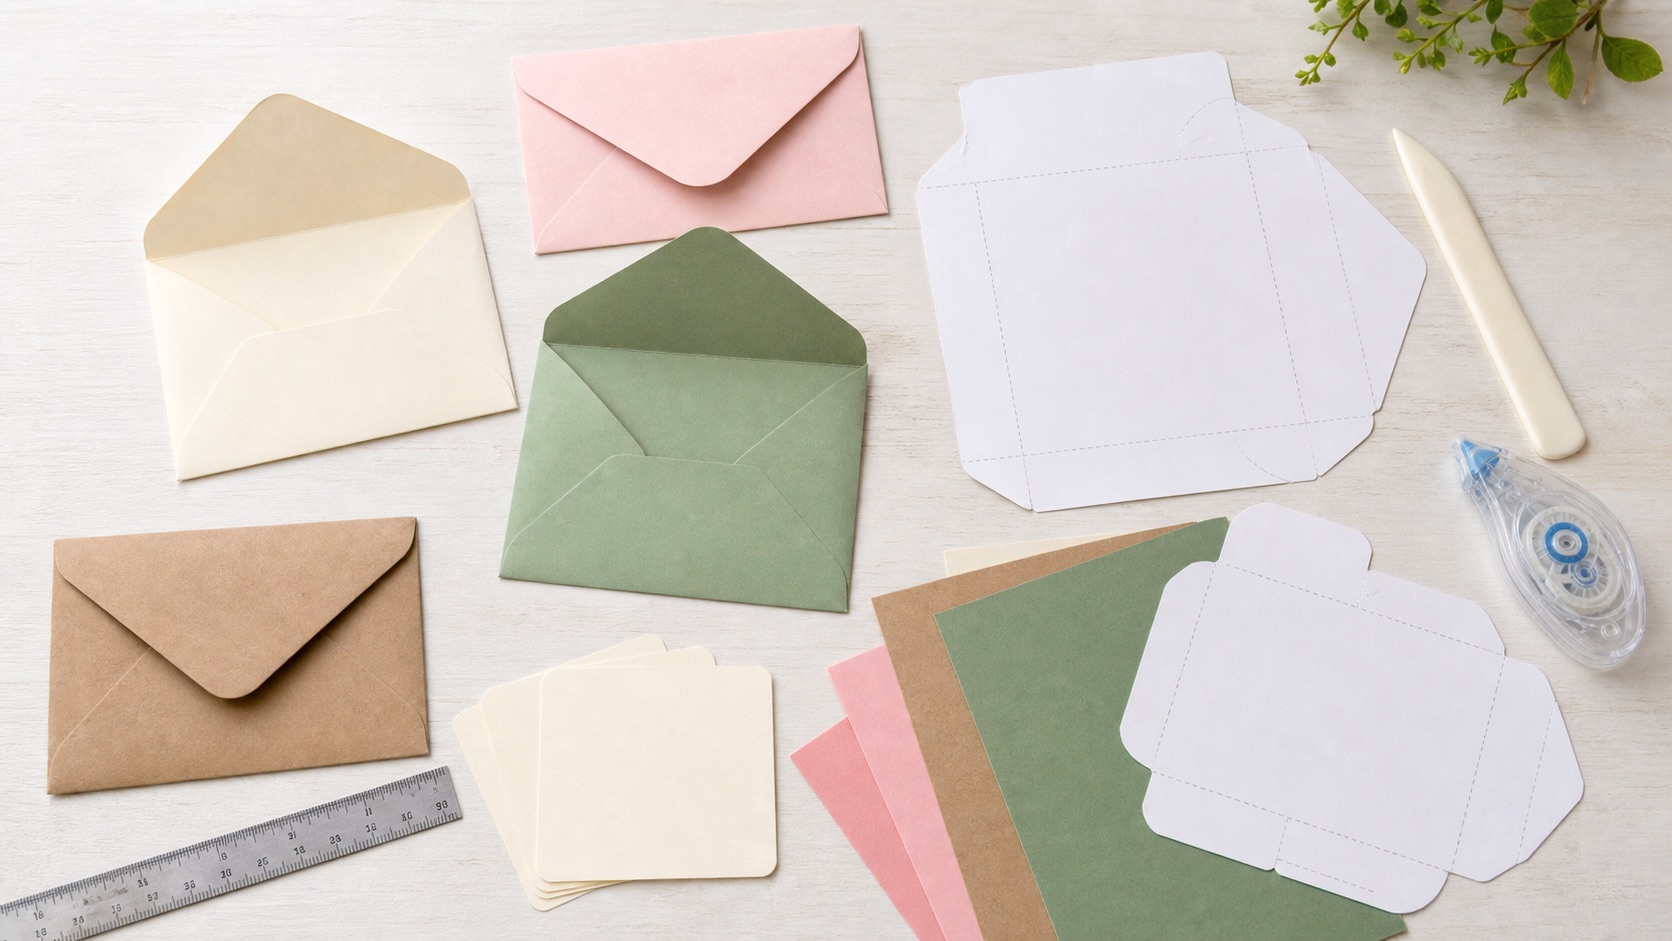
Download the free envelope template
One letter-size sheet: a 4 5/8 x 5 7/8 inch envelope face with side flaps, bottom flap, and top seal flap, ready to cut and fold. Solid lines are cut lines; the dashed rectangle marks the score-and-fold lines around the face.
Download template (SVG) Open and print Print at 100% / Actual Size with scaling off, then check the 1-inch test square with a ruler before cutting. Print directly onto text-weight decorative paper, or print on plain paper and trace onto the good stock. Full settings walkthrough: how to print at actual size.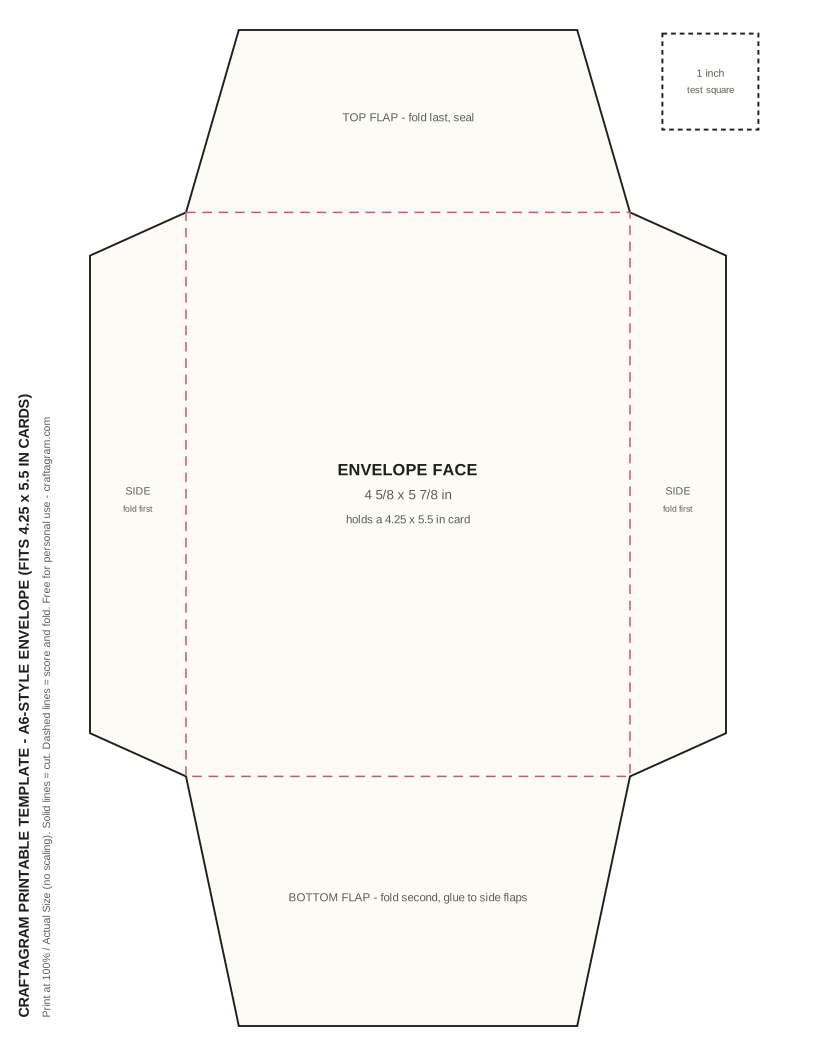
First, the naming mess: is this A2 or A6?
Craft blogs and envelope manufacturers use the same letters to mean different things, and it causes real ordering mistakes. In US stationery sizing, the envelope that fits a 4.25 x 5.5 inch card (a letter sheet folded in quarters) is officially an A2 envelope at 4.375 x 5.75 inches. The official A6 envelope is larger — 4.75 x 6.5 inches — and fits a 4.5 x 6.25 inch card. But in everyday craft usage, "A6 card" very often means the quarter-fold 4.25 x 5.5 card, because that is close to the international ISO A6 paper size (105 x 148 mm).
This template splits the difference on purpose: the face is 4 5/8 x 5 7/8 inches, slightly roomier than a store-bought A2. The extra breathing room matters for handmade cards, which are almost always thicker than flat commercial cards. If you are buying envelopes instead of making them, order by card measurement, never by letter name.
Envelope size chart
| Envelope style | Envelope size | Card it fits | Typical use |
|---|---|---|---|
| A2 (standard) | 4.375 x 5.75 in | 4.25 x 5.5 in quarter-fold | Notecards, thank-you cards |
| This template | 4.625 x 5.875 in | 4.25 x 5.5 in handmade (thicker) | Layered and embellished cards |
| A6 | 4.75 x 6.5 in | 4.5 x 6.25 in | Greeting cards, 4 x 6 photos |
| A7 | 5.25 x 7.25 in | 5 x 7 in | Invitations, photo cards |
| A10 | 6 x 9.5 in | 5.75 x 9.25 in | Large flat cards, certificates |
How the template goes together
- Cut the outer solid outline.
- Score all four dashed lines around the center face with a bone folder or an empty ballpoint pen against a ruler. Score before folding — folding unscored cardstock ruptures the fibers and leaves a ragged, cracked crease.
- Fold the two side flaps inward first.
- Fold the bottom flap up over the side flaps and glue it to them — a thin line of tape runner or liquid glue along the bottom flap's outer edges only. Keep adhesive out of the center so the card never touches glue.
- Slide the real card in, then fold the top flap down. Seal with a tape runner, glue stick, a sticker, or a wax seal for hand delivery.
Redrawing for a different card size
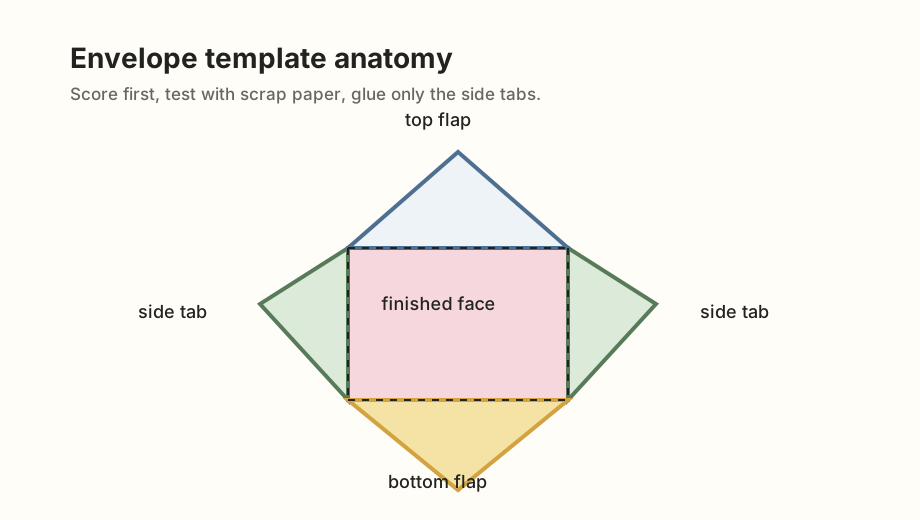
The template logic works for any insert — photos, cash gifts, gift cards, seed packets:
| Template part | Rule of thumb | Adjustment |
|---|---|---|
| Finished face | Card size + 0.25 to 0.375 in each dimension | Use the larger clearance for layered or foam-mounted cards. |
| Side flaps | 0.75 to 1 in wide, tapered | Wider flaps give the bottom flap more gluing surface. |
| Bottom flap | Roughly 40 to 45% of face height | Must overlap the side flaps by at least 0.5 in. |
| Top flap | Roughly 30 to 35% of face height | Extend and round it for a decorative look. |
Draw the face rectangle first, add flaps, cut it from scrap paper, and fold it around the real card before touching the good paper. The envelope size helper does the face and flat-template math from any insert measurement.
Face: 5 + 0.3 = 5.3 wide, 7 + 0.3 = 7.3 tall → round to 5.375 x 7.375 in. Side flaps 1 in each → flat width 7.375 in. Bottom flap 45% of 7.375 ≈ 3.3 in; top flap 33% ≈ 2.4 in → flat height 13.1 in. That no longer fits letter paper, so cut it from a 12 x 12 in scrapbook sheet rotated 45 degrees (the classic diagonal envelope layout), or shorten both flaps and accept a wider seam.
Paper choice
Text-weight paper (24 to 32 lb text) folds crisply, seals flat, and is what commercial envelopes use. Lightweight cardstock (65 lb cover) makes a substantial gift envelope for hand delivery, but the corners where side flaps and bottom flap overlap get bulky — flatten each corner under a heavy book for an hour after gluing. Regular 20 lb copy paper works for drafts but is translucent and tears at the flap fold in transit.
For thick, dimensional cards — ribbon bows, buttons, layered paper flowers — add a small gusset: score two parallel fold lines 1/8 inch apart along each face edge instead of one. The double score creates a shallow spine so the envelope opens like a box rather than a flat pocket.
Fit troubleshooting
| Symptom | Fix |
|---|---|
| Card catches at the corners going in | Increase the face size, not the flap shape. Recut with 1/8 in more clearance each way. |
| Envelope bows outward when sealed | Card is too thick for a flat envelope — add the double-score gusset, or trim side flaps narrower so they stop fighting the card. |
| Top flap barely reaches | Deepen only the top flap. Making the whole envelope taller creates a loose, sloppy fit. |
| Small holes at the bottom corners | Widen the side flaps slightly so the bottom flap overlaps them fully. |
| Flaps land crooked | The flat cutout was not square. Check the first cut against a right angle; a 1/32 in error compounds at every fold. |
| Glue squeezes onto the card | Apply adhesive as a thin line along the outer edges of the flaps only, never in the field. |
Decoration timing
Add liners, stamps, stickers, and labels only after the envelope test-fits. A liner adds thickness, so trim it about 1/8 inch smaller than the face on all sides and keep its adhesive above the fold line so the flap still bends freely. Raised wax seals and buttons are better reserved for hand delivery; postal machines can crack them or snag neighboring mail.
Once a scrap-paper version fits, write the card size and paper type directly on it. That draft becomes a reusable template that outlasts this page.
FAQ
What is the best adhesive for sealing envelopes that will be mailed?
A double-sided tape runner gives a clean, flat hold that will not warp the paper. Among wet options, envelope glue with a sponge applicator dries flat and survives postal sorting; ordinary glue sticks can let go in humid weather.
Can I mail a handmade cardstock envelope?
Usually yes, with extra postage if it is rigid or over 1/4 inch thick. Square envelopes and lumpy embellishments trigger non-machinable surcharges in the US. Take one finished envelope to the post office and ask before mailing a batch.
How do I make the top flap pointed or rounded?
Cut the template's straight top flap, fold everything, then trim the flap freehand or trace a bowl edge for a curve. Shaping the flap after assembly guarantees the point lands on the envelope's center line.